ในบทช่วยสอนนี้ คุณจะได้เรียนรู้วิธีการ ทำให้สามารถ TLSv1.3 บน NGINX. มันหมายความว่าอะไร TLSv 1.3, มันช่วยอะไร และทำไม คุณต้องการ บนเว็บเซิร์ฟเวอร์เช่น TLS สามารถเปิดใช้งานได้. สำหรับเซิร์ฟเวอร์ที่มีระบบการจัดการ VestaCP (CentOS หรือ Ubuntu) ยากขึ้นเล็กน้อย เพื่อเปิดใช้งาน TLS 1.3 มากกว่าบนเซิร์ฟเวอร์ cPanel แต่ก็ใช่ว่าจะเป็นไปไม่ได้
เนื้อหา
ทำไมดีกว่า TLS 1.3กว่า TLS ? 1.2
TLS (Transport Layer Security) เป็น โปรโตคอลการเข้ารหัส ซึ่งทำให้มั่นใจได้ ความปลอดภัยในการเชื่อมต่อ ระหว่างคอมพิวเตอร์กับเครือข่ายที่เป็นส่วนหนึ่ง TLS ใช้ในแอปพลิเคชันเช่น: อีเมล, ส่งข้อความ, การโทรด้วยเสียงและวิดีโอ (VoIP) แต่โดยเฉพาะอย่างยิ่งที่ HTTPS. มั่นใจได้ถึงการสื่อสารที่ปลอดภัยระหว่างคอมพิวเตอร์หรือสมาร์ทโฟนของผู้ใช้กับเว็บเซิร์ฟเวอร์ของหน้าที่เข้าถึง
TLS 1.3 มี ความเร็วที่สูงขึ้น ของการเชื่อมต่อไคลเอ็นต์ – เซิร์ฟเวอร์ และก การรักษาความปลอดภัยนอกจากนี้ยังมี โดยการกำจัดอัลกอริธึมบางอย่าง ความแตกต่างระหว่าง TLSv1.2 และ TLSv1.3.
เกี่ยวกับ HTTPS, SSL (Secure Sockets Layer) ฉันยังพูดในบทความอื่น:
- วิธีการติดตั้งใบรับรอง SSL (HTTPS การเชื่อมต่อ) สำหรับเว็บไซต์ที่โฮสต์บนเซิร์ฟเวอร์ NGINX โดยไม่มี cPanel หรือ VestaCP
- คอมไพล์ใหม่ OpenSSL 1.1 & NGINX 1.25 สำหรับ TLS 1.3 (CentOS 7)
- วิธีย้ายบล็อกหรือเว็บไซต์ WordPress จาก HTTP on HTTPS (หงิงซ์)
- ลบโดเมนเก่า Certbot certificates (มาเข้ารหัสใบรับรองกันเถอะ)
วิธีเปิดใช้งาน TLS 1.3 บน NGINX คืออย่างไร? เซิร์ฟเวอร์ที่มีการจัดการโดย VestaCP / CentOS
ก่อนที่คุณจะเห็นว่าคุณเปิดใช้งานอย่างไร TLSv1.3 บน NGINX คุณต้องพิจารณาข้อกำหนดขั้นต่ำบางประการสำหรับ TLS 1.3.
- NGINX 1.13.x หรือใหม่กว่า
- ใบรับรอง TLS ถูกต้อง
- ชื่อโดเมนที่ใช้งานพร้อม DNS ที่กำหนดค่าอย่างเหมาะสม - สามารถเข้าถึงได้บนอินเทอร์เน็ต
- ใบรับรอง TLS / SSL ถูกต้อง. นอกจากนี้ยังสามารถ Let’s Encrypt.
Pe VestaCP ติดตั้งเมื่อนานมาแล้ว เรามีเฉพาะโปรโตคอลเท่านั้น TLS 1.2. ฉันได้เห็นในบทช่วยสอนมากมายว่ามันเพียงพอแล้ว nginx.conf เพิ่มบรรทัดต่อไปนี้สำหรับ ca TLS 1.3 ที่จะเปิดใช้งาน:
server {

  listen 443 ssl http2;
  listen [::]:443 ssl http2;

  server_name example.com;
  root /var/www/example.com/public;

  ssl_certificate /path/to/your/certificate.crt;
  ssl_certificate_key /path/to/your/private.key;

  ssl_protocols TLSv1.2 TLSv1.3;
ปลอม. ถ้า เซิร์ฟเวอร์ CentOS ด้วยการจัดการ VestaCP, NGINX ยังไม่ได้รวบรวม ด้วยเวอร์ชันขั้นต่ำ OpenSSL 1.1.1.1, ssl_protocols TLSv1.2 TLSv1.3; ใน nginx.conf ..มันไม่ช่วยเลย.
[root@north ~]# nginx -V
nginx version: nginx/1.22.0
built by gcc 4.8.5 20150623 (Red Hat 4.8.5-44) (GCC)
built with OpenSSL 1.0.2k-fips  26 Jan 2017
TLS SNI support enabled
ดังนั้นในตัวอย่างข้างต้น Nginx 1.22.0 จึงเป็นเวอร์ชันที่เข้ากันได้ TLS 1.3 แต่ห้องสมุดไม่ได้ช่วยเรา OpenSSL 1.0.2k-fips.
เพื่อเปิดใช้งาน TLSv1.3 บน Nginx คุณต้องติดตั้งไลบรารี่ลูกและแพ็คเกจการพัฒนาก่อน Development Tools. มันวิ่งเข้ามา CentOS 7 บรรทัดคำสั่ง:
yum install gcc gcc-c++ pcre-devel zlib-devel make unzip gd-devel perl-ExtUtils-Embed libxslt-devel openssl-devel perl-Test-Simple
yum groupinstall 'Development Tools'
1. ติดตั้งเวอร์ชันล่าสุด OpenSSL
ขณะนี้เวอร์ชันล่าสุดคือ OpenSSL 1.1.1pแต่เท่าที่สังเกตก็มี and OpenSSL 3. คุณสามารถค้นหาแหล่งที่มาได้ OpenSSLOrg..
cd /usr/src
wget https://www.openssl.org/source/openssl-1.1.1p.tar.gz
tar xvf openssl-1.1.1p.tar.gz
mv openssl-1.1.1p openssl
cd openssl
./config --prefix=/usr/local/openssl --openssldir=/usr/local/openssl --libdir=/lib64 shared zlib-dynamic
make -j4
make test
make install
สำคัญมากในการวิ่ง make test ก่อนติดตั้งห้องสมุด หากการทดสอบมีข้อผิดพลาด ห้ามเรียกใช้ make install จนกว่าจะแก้ไขข้อผิดพลาด
ในขั้นตอนถัดไป เราทำการสำรองข้อมูลของไฟล์ไบนารีปัจจุบัน openssl และเราเพิ่ม symlink ไปที่ใหม่
mv /usr/bin/openssl /usr/bin/openssl-backup
ln -s /usr/local/openssl/bin/openssl /usr/bin/openssl
ใน /usr/local/openssl/bin ดำเนินการ ldd เพื่อตรวจสอบการพึ่งพา openssl. เรายังสามารถตรวจสอบเวอร์ชันของ openssl. สั่งการ openssl version.
[root@north bin]# ldd openssl
	linux-vdso.so.1 =>  (0x00007ffd20bd7000)
	libssl.so.1.1 => /lib64/libssl.so.1.1 (0x00007fab09b62000)
	libcrypto.so.1.1 => /lib64/libcrypto.so.1.1 (0x00007fab09675000)
	libdl.so.2 => /lib64/libdl.so.2 (0x00007fab09471000)
	libpthread.so.0 => /lib64/libpthread.so.0 (0x00007fab09255000)
	libc.so.6 => /lib64/libc.so.6 (0x00007fab08e87000)
	/lib64/ld-linux-x86-64.so.2 (0x00007fab09df5000)
[root@north bin]# openssl version
OpenSSL 1.1.1p  21 Jun 2022
ขณะนี้เราได้ติดตั้งเวอร์ชันล่าสุดแล้ว OpenSSL ซึ่งคงอยู่ TLSv1.3. เราสามารถตรวจสอบเวอร์ชัน TLS / SSL สนับสนุนโดยร้านหนังสือ OpenSSL ตามคำสั่ง:
[root@north bin]# openssl ciphers -v | awk '{print $2}' | sort | uniq
SSLv3
TLSv1
TLSv1.2
TLSv1.3
[root@north bin]#
นี่ไม่ได้หมายความว่าเว็บไซต์โฮสต์ด้วยความช่วยเหลือจากผู้จัดการ VestaCP พวกเขาจะได้ในทันที TLS 1.3.
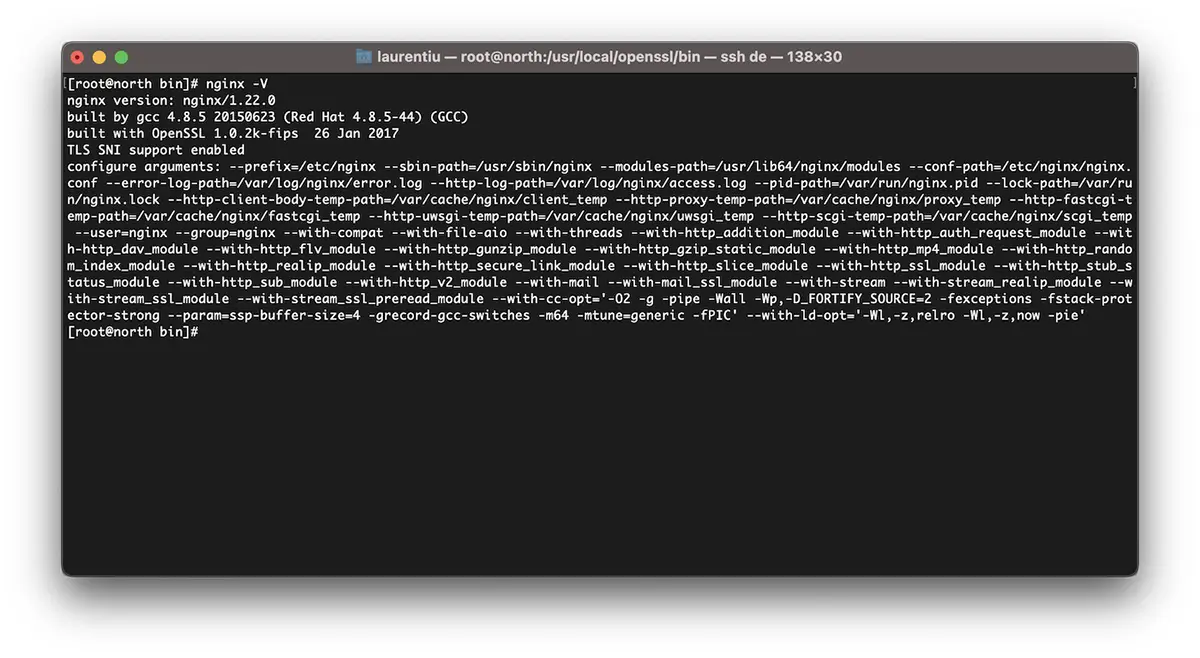
แม้ว่าเราได้ติดตั้ง OpenSSL 1.1.1p, Nginx รวบรวมด้วยเวอร์ชันเก่า OpenSSL 1.0.2k-fips.
[root@north bin]# nginx -V
nginx version: nginx/1.22.0
built by gcc 4.8.5 20150623 (Red Hat 4.8.5-44) (GCC)
built with OpenSSL 1.0.2k-fips  26 Jan 2017
TLS SNI support enabled
configure arguments: --prefix=/etc/nginx --sbin-path=/usr/sbin/nginx --modules-path=/usr/lib64/nginx/modules --conf-path=/etc/nginx/nginx.conf --error-log-path=/var/log/nginx/error.log --http-log-path=/var/log/nginx/access.log --pid-path=/var/run/nginx.pid --lock-path=/var/run/nginx.lock --http-client-body-temp-path=/var/cache/nginx/client_temp --http-proxy-temp-path=/var/cache/nginx/proxy_temp --http-fastcgi-temp-path=/var/cache/nginx/fastcgi_temp --http-uwsgi-temp-path=/var/cache/nginx/uwsgi_temp --http-scgi-temp-path=/var/cache/nginx/scgi_temp --user=nginx --group=nginx --with-compat --with-file-aio --with-threads --with-http_addition_module --with-http_auth_request_module --with-http_dav_module --with-http_flv_module --with-http_gunzip_module --with-http_gzip_static_module --with-http_mp4_module --with-http_random_index_module --with-http_realip_module --with-http_secure_link_module --with-http_slice_module --with-http_ssl_module --with-http_stub_status_module --with-http_sub_module --with-http_v2_module --with-mail --with-mail_ssl_module --with-stream --with-stream_realip_module --with-stream_ssl_module --with-stream_ssl_preread_module --with-cc-opt='-O2 -g -pipe -Wall -Wp,-D_FORTIFY_SOURCE=2 -fexceptions -fstack-protector-strong --param=ssp-buffer-size=4 -grecord-gcc-switches -m64 -mtune=generic -fPIC' --with-ld-opt='-Wl,-z,relro -Wl,-z,now -pie'
[root@north bin]# openssl version
OpenSSL 1.1.1p  21 Jun 2022
[root@north bin]#
2. คอมไพล์ Nginx ใหม่สำหรับระบบ VestaCP
ในขั้นตอนนี้เราต้องคอมไพล์ใหม่สำหรับ OpenSSL ติดตั้งเวอร์ชันของ Nginx แล้ว บนระบบ CentOS / VestaCP. อย่างที่ผมบอกไปข้างต้น ในกรณีของผมก็คือ nginx/1.22.0. เนื่องจากเรากำลังพูดถึงเว็บเซิร์ฟเวอร์ที่มี VestaCP ระบบการดูแลระบบ ก่อนที่เราจะเริ่มคอมไพล์ใหม่ ควรทำการสำรองข้อมูลไฟล์คอนฟิก nginx
สำรองข้อมูล Nginx ปัจจุบันในระบบ VestaCP
เก็บถาวรและเก็บไว้ที่ใดที่หนึ่งบนเซิร์ฟเวอร์ไดเรกทอรี "/etc/nginx"และ"/usr/local/vesta/nginx"
วิ่ง nginx -V และบันทึกโมดูลที่มีอยู่ลงในไฟล์
configure arguments: --prefix=/etc/nginx --sbin-path=/usr/sbin/nginx --modules-path=/usr/lib64/nginx/modules --conf-path=/etc/nginx/nginx.conf --error-log-path=/var/log/nginx/error.log --http-log-path=/var/log/nginx/access.log --pid-path=/var/run/nginx.pid --lock-path=/var/run/nginx.lock --http-client-body-temp-path=/var/cache/nginx/client_temp --http-proxy-temp-path=/var/cache/nginx/proxy_temp --http-fastcgi-temp-path=/var/cache/nginx/fastcgi_temp --http-uwsgi-temp-path=/var/cache/nginx/uwsgi_temp --http-scgi-temp-path=/var/cache/nginx/scgi_temp --user=nginx --group=nginx --with-compat --with-file-aio --with-threads --with-http_addition_module --with-http_auth_request_module --with-http_dav_module --with-http_flv_module --with-http_gunzip_module --with-http_gzip_static_module --with-http_mp4_module --with-http_random_index_module --with-http_realip_module --with-http_secure_link_module --with-http_slice_module --with-http_ssl_module --with-http_stub_status_module --with-http_sub_module --with-http_v2_module --with-mail --with-mail_ssl_module --with-stream --with-stream_realip_module --with-stream_ssl_module --with-stream_ssl_preread_module --with-cc-opt='-O2 -g -pipe -Wall -Wp,-D_FORTIFY_SOURCE=2 -fexceptions -fstack-protector-strong --param=ssp-buffer-size=4 -grecord-gcc-switches -m64 -mtune=generic -fPIC' --with-ld-opt='-Wl,-z,relro -Wl,-z,now -pie'
วิธีคอมไพล์ Nginx ใหม่เพื่ออัปเกรด OpenSSL / CentOS 7
ฉันพูดซ้ำ ถ้าคุณมี VestaCPให้ดาวน์โหลดเวอร์ชันของ Nginx ที่คุณติดตั้งไว้แล้ว คุณสามารถค้นหาไฟล์เก็บถาวรทั้งหมดที่มีเวอร์ชัน Nginx nginx.org.
cd /usr/src
wget https://nginx.org/download/nginx-1.22.0.tar.gz
tar xvf nginx-1.22.0.tar.gz
cd nginx-1.22.0
เราคอมไพล์โมดูล nginx ใหม่:
./configure --prefix=/etc/nginx \
--sbin-path=/usr/sbin/nginx \
--modules-path=/usr/lib64/nginx/modules \
--conf-path=/etc/nginx/nginx.conf \
--error-log-path=/var/log/nginx/error.log  \
--http-log-path=/var/log/nginx/access.log  \
--pid-path=/var/run/nginx.pid  \
--lock-path=/var/run/nginx.lock  \
--http-client-body-temp-path=/var/cache/nginx/client_temp  \
--http-proxy-temp-path=/var/cache/nginx/proxy_temp  \
--http-fastcgi-temp-path=/var/cache/nginx/fastcgi_temp  \
--http-uwsgi-temp-path=/var/cache/nginx/uwsgi_temp  \
--http-scgi-temp-path=/var/cache/nginx/scgi_temp  \
--user=nginx  \
--group=nginx  \
--with-compat  \
--with-file-aio  \
--with-threads  \
--with-http_addition_module  \
--with-http_auth_request_module  \
--with-http_dav_module  \
--with-http_flv_module  \
--with-http_gunzip_module  \
--with-http_gzip_static_module  \
--with-http_mp4_module  \
--with-http_random_index_module  \
--with-http_realip_module  \
--with-http_secure_link_module  \
--with-http_slice_module  \
--with-http_ssl_module  \
--with-http_stub_status_module  \
--with-http_sub_module  \
--with-http_v2_module  \
--with-mail  \
--with-mail_ssl_module  \
--with-stream  \
--with-stream_realip_module  \
--with-stream_ssl_module  \
--with-stream_ssl_preread_module  \
--with-openssl=/usr/src/openssl  \
--with-cc-opt='-O2 -g -pipe -Wall -Wp,-D_FORTIFY_SOURCE=2 -fexceptions -fstack-protector-strong  \
--param=ssp-buffer-size=4 -grecord-gcc-switches -m64 -mtune=generic -fPIC'  \
--with-ld-opt='-Wl,-z,relro -Wl,-z,now -pie'
make -j4
make installขณะนี้เราได้ติดตั้ง Nginx และคอมไพล์ด้วยเวอร์ชันล่าสุดของ OpenSSL ทนได้ TLSv1.3
[root@north bin]# nginx -V
nginx version: nginx/1.22.0
built by gcc 4.8.5 20150623 (Red Hat 4.8.5-44) (GCC)
built with OpenSSL 1.1.1p  21 Jun 2022
TLS SNI support enabled
*หากติดตั้ง nginx บนเซิร์ฟเวอร์แล้ว คุณจะต้องถอนการติดตั้ง คอมไพล์ไม่ทำงานในการอัปเกรด nginx
วิธีเปิดใช้งาน TLSv1.3 สำหรับโดเมนใน VestaCP คืออย่างไร?
ในไฟล์ /etc/nginx/nginx.conf เราเพิ่มบรรทัดต่อไปนี้:
ssl_protocols TLSv1.2 TLSv1.3;
ssl_prefer_server_ciphers on;
ssl_ciphers 'ECDHE-ECDSA-AES256-GCM-SHA384:ECDHE-RSA-AES256-GCM-SHA384:ECDHE-ECDSA-CHACHA20-POLY1305:ECDHE-RSA-CHACHA20-POLY1305:ECDHE-ECDSA-AES128-GCM-SHA256:ECDHE-RSA-AES128-GCM-SHA256:ECDHE-ECDSA-AES256-SHA384:ECDHE-RSA-AES256-SHA384:ECDHE-ECDSA-AES128-SHA256:ECDHE-RSA-AES128-SHA256';
ที่ระดับโดเมน ฉันเปลี่ยนบางอย่างในเทมเพลต VestaCP และเปิดใช้งาน HTTP/2. ดังนั้นเมื่อเพิ่มโดเมนใหม่ (example.com) โดยเปิดใช้งาน Let's Encrypt ฉันมีไฟล์กำหนดค่าต่อไปนี้สำหรับ SSL:
cat /home/vestacpuser/conf/web/example.com.nginx.ssl.conf

server {
    listen      IP.IP.IP.IP:443 ssl http2;
    server_name example.com www.example.com;
    root        /home/vestacpuser/web/example.com/public_html;
    index       index.php index.html index.htm;
    access_log  /var/log/nginx/domains/example.com.log combined;
    access_log  /var/log/nginx/domains/example.com.bytes bytes;
    error_log   /var/log/nginx/domains/example.com.error.log error;

    ssl_certificate      /home/vestacpuser/conf/web/ssl.example.com.pem;
    ssl_certificate_key  /home/vestacpuser/conf/web/ssl.example.com.key;

....

ssl_protocols TLSv1.2 TLSv1.3;
ssl_prefer_server_ciphers on;
ssl_ciphers 'ECDHE-ECDSA-AES256-GCM-SHA384:ECDHE-RSA-AES256-GCM-SHA384:ECDHE-ECDSA-CHACHA20-POLY1305:ECDHE-RSA-CHACHA20-POLY1305:ECDHE-ECDSA-AES128-GCM-SHA256:ECDHE-RSA-AES128-GCM-SHA256:ECDHE-ECDSA-AES256-SHA384:ECDHE-RSA-AES256-SHA384:ECDHE-ECDSA-AES128-SHA256:ECDHE-RSA-AES128-SHA256';
ก่อนที่จะรีสตาร์ท nginx คุณควรทดสอบการกำหนดค่าก่อน
[root@north web]# nginx -t
nginx: the configuration file /etc/nginx/nginx.conf syntax is ok
nginx: configuration file /etc/nginx/nginx.conf test is successful
[root@north web]# systemctl restart nginx
ฉันหวังว่าคุณจะพบว่าบทช่วยสอนนี้มีประโยชน์ และหากคุณติดขัดอะไร ให้ทิ้งรายละเอียดปัญหาไว้ในความคิดเห็น